How To Perform Dynamic Code Instrumentation in a Python Application
Jun 19, 2023


Code instrumentation is an essential practice in modern software development. Not only does it aid in debugging, it ultimately impacts the MTTR (Mean Time to Resolve) for software running in production. With changing software architectures and deployment patterns over the years, approaches to code instrumentation have also undergone a significant shift.
This post will take you through a Python developer’s journey of employing various code instrumentation techniques, from static to dynamic code instrumentation. Along the way, we will analyze how a particular approach to code instrumentation impacts debugging productivity and production operations.
What is code instrumentation?
Code instrumentation entails injecting additional code within a software program to analyze its runtime behavior. There are two parts to it: adding the instrumentation code and analyzing the instrumentation output. Based on these requirements, there are three approaches to code instrumentation:
- Static code debugging and analysis. In this case, code instrumentation is inherently performed through a debugger that operates at the source level to pause and inspect the runtime execution context.
- Static code instrumentation. In this case, the source code is modified to add additional instrumentation code. The analysis happens during runtime by studying the instrumentation output, primarily in the form of logs.
- Dynamic code instrumentation. In this case, both the instrumentation code injection and analysis happen within the runtime footprint of the software without the need to modify the source code.
All three approaches have their merits, and are employed during various phases of software development. Let’s look at the three approaches to achieving code instrumentation in Python to understand their effectiveness and impact.
To try out the sample Python code used for demonstrating the code instrumentation approaches in this article, you must have a Python 3 environment (preferably 3.10 or below) on a Windows (or XWindows) computer.
Approach 1: Static code debugging and analysis using native Python debugger
If you are a seasoned Python developer, you must be familiar with the pdb module. This interactive source code debugger in Python supports most of the basic facilities for this code instrumentation approach.
Let’s have a quick look at the Python code we will use to demonstrate the functionality of pdb. Here is a sample Python program that simulates a long-running Python script.
import pyautogui
from time import sleep
from random import random
from threading import Thread

# long-running background task tracking mouse pointer

global current_pointer

def background_task():
    global current_pointer

    # record the current pointer value
    current_pointer = pyautogui.position()

    # run forever
    while True:
        # Detect and report mouse movement
        report_mouse_movement()

        # wait for a while
        sleep(0.25)

def report_mouse_movement():
    global current_pointer

    # capture it as the last pointer value
    last_pointer = current_pointer

    # check for change in mouse position
    current_pointer = pyautogui.position()
    if current_pointer != last_pointer:
        # report the change
        print(f"Mouse Pointer Location Change: X: {current_pointer.x}, Y: {current_pointer.y}")

        if (current_pointer.x > last_pointer.x):
            print("Mouse moved left")
        else:
            print("Mouse moved right")

        if (current_pointer.y > last_pointer.y):
            print("Mouse moved up")
        else:
            print("Mouse moved down")

# create and start the daemon thread
print('Starting background task for monitoring mouse position...')
daemon = Thread(target=background_task, daemon=True, name='Monitor')
daemon.start()

wait = 60
print(f"Main thread monitoring mouse movement for {wait} seconds")
sleep(wait)

print('Main thread exiting.')
This program runs for a predefined time and spawns a thread to track mouse movement on Windows. The actual business logic is contained within the report_mouse_movement() function, which detects any changes in the X or Y position and displays that.
To run this program, you must first install the pyautogui module:
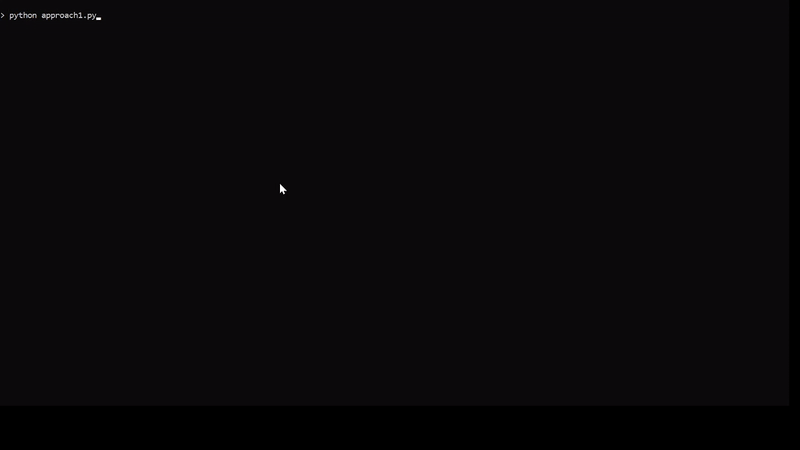
pip install pyautoguiHere is a sample output of the program at runtime:
If you closely follow the mouse cursor, you can see that the program displays the X and Y positions for every change in the mouse position and the direction of the mouse’s movement.
Do you see any glitches in the program output?
If you are a curious observer, you have probably noticed a bug. If not, look at the screencast above again. The direction of mouse movement reported by the program is the opposite of the actual mouse movement. Yeah! That’s a deliberate bug that we introduced in the code.
Let’s put pdb into action to identify this bug. To do that, you must modify the source code to import the pdb module and set the interruption point:
import pdb  # IMPORT PDB MODULE AT THE TOP

.....
.....
.....


def background_task():
    global current_pointer

    # record the current pointer value
    current_pointer = pyautogui.position()

    pdb.set_trace()  # SET INTERRUPTION POINT FOR DEBUGGER

    ....
If you run this program now, you can step through the code to understand what happens after every line of execution of the code.
A closer analysis shows that the if condition blocks for displaying the mouse direction messages are wrongly placed. The direction display bug can be fixed by swapping the messages between the if and else block.
pdb supports a lot of features for static code analysis, such as setting breakpoints and printing variable values, to let developers dive deeper into the business logic while controlling the runtime execution.
Advantages of static code debugging and analysis
- Easy to employ with the built-in debugger.
- Source level walk-through to analyze business logic.
Disadvantages of static code debugging and analysis
- Requires source code or build modification.
- Interrupts the runtime execution.
Static code debugging and analysis is best suited during the development phase, where developers frequently debug and change the source code as part of their unit testing.
Approach 2: Static code instrumentation using Python telemetry SDKs
pdb interrupts the program execution and lets you sneak inside the source code. But this approach obviously does not work for production deployment, where the program is supposed to run continuously. That’s where telemetry SDKs come into the picture to provide a standard interface for facilitating static code instrumentation.
The OpenTelemetry suite of SDKs is the best choice for this purpose. It is a de-facto industry standard for collecting telemetry data, such as metrics, logs, and traces. In addition, it supports Python and most of the popular languages.
Let’s look at a revised version of the previous program with the OpenTelemetry Python SDK.
Note: For now, we have retained the bug in the program, as the intent of this article is to identify the bug via various code instrumentation approaches rather than fixing it.
from opentelemetry import trace
from opentelemetry.sdk.trace import TracerProvider
from opentelemetry.sdk.trace.export import (
    BatchSpanProcessor,
    ConsoleSpanExporter,
)
import pyautogui
from time import sleep
from random import random
from threading import Thread

# long-running background task tracking mouse pointer

global current_pointer

def background_task():
    global current_pointer

    # record the current pointer value
    current_pointer = pyautogui.position()

    # run forever
    while True:
        # Detect and report mouse movement
        report_mouse_movement()

        # wait for a while
        sleep(0.25)

def report_mouse_movement():
    global current_pointer

    # capture it as the last pointer value
    last_pointer = current_pointer

    # check for change in mouse position
    current_pointer = pyautogui.position()
    if current_pointer != last_pointer:

        with tracer.start_as_current_span("server_request"):

            # report the change
            print(f"Mouse Pointer Location Change: X: {current_pointer.x}, Y: {current_pointer.y}")

            span = trace.get_current_span()

            span.add_event("log", {
                "current.pointer.x": current_pointer.x,
                "last.pointer.x": last_pointer.x,
                "current.pointer.y": current_pointer.y,
                "last.pointer.y": last_pointer.y,
            })

            if (current_pointer.x > last_pointer.x):
                print("Mouse moved left")
            else:
                print("Mouse moved right")

            if (current_pointer.y > last_pointer.y):
                print("Mouse moved up")
            else:
                print("Mouse moved down")

provider = TracerProvider()
processor = BatchSpanProcessor(ConsoleSpanExporter())
provider.add_span_processor(processor)
trace.set_tracer_provider(provider)
tracer = trace.get_tracer(__name__)

if "__main__" == __name__:
    # create and start the daemon thread
    print('Starting background task for monitoring mouse position...')
    daemon = Thread(target=background_task, daemon=True, name='Monitor')
    daemon.start()

    wait = 60
    print(f"Main thread monitoring mouse movement for {wait} seconds")
    sleep(wait)

    print('Main thread exiting.')
The telemetry SDK defines a set of spans and contexts to capture metrics and other code level data. If you look within report_mouse_movement(), you can see the log event added for every mouse movement capture.
To run this program, you must install the telemetry SDK within your Python environment:
pip install opentelemetry-sdkOnce you run the program and move the mouse, you will start seeing the telemetry output in the terminal console.
Unlike pdb, this program will continue to run and generate telemetry output for further analysis. However, if the telemetry output reveals a bug that needs further investigation, developers must add additional spans within the source code and rerun the program. Since this approach involves source code modification, it is called static instrumentation.
Advantages of static code instrumentation
- Easy to generate telemetry logs anywhere in the source code.
- Runtime analysis does not require interruptions.
Disadvantages of static code instrumentation
- Requires source code modification for change in telemetry requirements.
- Too much telemetry output leads to redundant log files and degraded system performance.
Static code instrumentation is best suited during the integration or staging phases of the project, where the software is being analyzed for runtime performance by capturing telemetry logs of profiling information.
Approach 3: Dynamic instrumentation with Lightrun Python agent
With dynamic instrumentation, code modification and analysis happen at runtime without altering the source code for adding telemetry logs.
To dynamically instrument Python code, you need to enable an agent that receives instructions from a developer to add and modify instrumentation code at runtime.
Lightrun offers a robust solution to this approach. When you sign up for a Lightrun account, you can install the Lightrun agent in your Python code as follows:
import pyautogui
from time import sleep
from random import random
from threading import Thread

try:
    import lightrun

    lightrun.enable(
        company_key='<YOUR_LIGHTRUN_KEY>')
except ImportError as e:
    print("Error importing Lightrun: ", e)

global current_pointer

def background_task():
    global current_pointer

    # record the current pointer value
    current_pointer = pyautogui.position()

    # run forever
    while True:
        # Detect and report mouse movement
        report_mouse_movement()

        # wait for a while
        sleep(0.25)

def report_mouse_movement():
    global current_pointer

    # capture it as the last pointer value
    last_pointer = current_pointer

    # check for change in mouse position
    current_pointer = pyautogui.position()
    if current_pointer != last_pointer:

        # report the change
        print(f"Mouse Pointer Location Change: X: {current_pointer.x}, Y: {current_pointer.y}")

        if (current_pointer.x > last_pointer.x):
            print("Mouse moved left")
        else:
            print("Mouse moved right")

        if (current_pointer.y > last_pointer.y):
            print("Mouse moved up")
        else:
            print("Mouse moved down")

if "__main__" == __name__:
    # create and start the daemon thread
    print('Starting background task for monitoring mouse position...')
    daemon = Thread(target=background_task, daemon=True, name='Monitor')
    daemon.start()

    wait = 3600
    print(f"Main thread monitoring mouse movement for {wait} seconds")
    sleep(wait)

    print('Main thread exiting.')
This program gets rid of all the telemetry related code and pdb. Only one import statement is added that embeds the Lightrun agent. Before testing this program, you must:
- Replace the placeholder <YOUR_LIGHTRUN_KEY> with the actual key as part of your Lightrun account.
- Install the lightrun module via
pip install lightrun.
Here is how you can dynamically instrument this code to expose the bug:
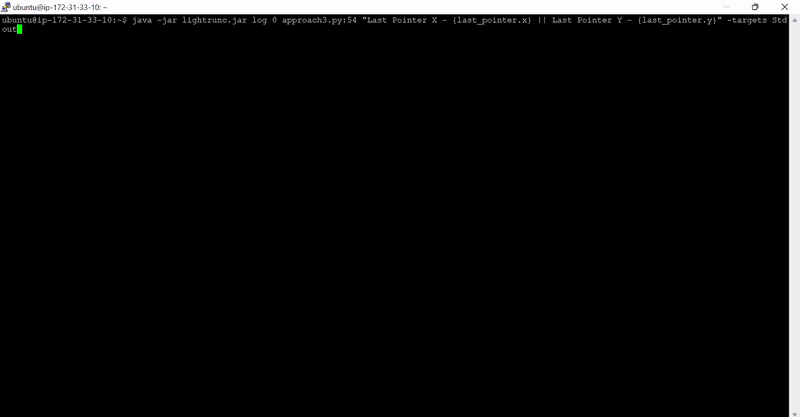
When the code is executed, the Lightrun agent starts up and runs within the execution environment of the Python program. To dynamically add code instrumentation, a Lightrun CLI, running on another terminal, sets the log message on specific lines within the source code. As a result, the program output starts displaying the log messages when that source line is hit at runtime.
As you can see, we prompted the Lightrun agent to initiate the display of log messages for displaying the X and Y position of the mouse cursor, while the program is running. This action was achieved without altering the source code or interrupting the runtime execution. That’s the power of dynamic instrumentation.
Advantages of dynamic code instrumentation
- Instrumentation always happens at runtime without any pollution of the source code with temporary instrumentation code.
- Instrumentation output is available for analysis instantly at runtime.
- There are no storage costs for massive log files due to overlogging.
Disadvantages of dynamic code instrumentation
- Requires an agent to run alongside the program.
The Lightrun agent is guarded by Lightrun Sandbox™, a robust, patent-pending mechanism that ensures that each instrumentation action performed on the runtime program is secure and performant, thereby eliminating the disadvantages of dynamic instrumentation.
Here at Lightrun, we are committed to building a platform that gives developers the power to understand the behavior of their live applications on-demand, in real time, without ever stopping running applications.
If you struggle to monitor your Python application in production, try Lightrun. In addition to Python, Lightrun also supports Node.js, Java, and .NET applications.