What is Git HEAD, and how should you use it?
Dec 22, 2022


Git is a powerful version-controlling system designed to quickly and effectively manage any project. If you’re one of the 83 million developers who use Git, you’ve probably heard of Git HEAD before.
When working with Git, you can check out only one branch at a time – the current or active branch. Git HEAD refers to the tip of this active branch. This article will teach you about Git HEAD and how to find and check its status.
What is Branching?
Branching is a common feature available in most version control systems. Although it can be a time-consuming activity in other version control systems, it is an integral part of the day-to-day development process in Git. Developers can create branches to work with a copy of the main code without modifying the existing version. Using Git branching, you can divide the codebase into independent lines of development and work on different versions of the repository parallelly.
For example, imagine you have to fix a bug or add a new feature. It can be risky to add the code changes directly to the production code before it is tested and reviewed by the appropriate parties. When you need to fix a bug or add a new feature, Git branching allows you to diverge it from the production code and merge it only after it is tested and reviewed.
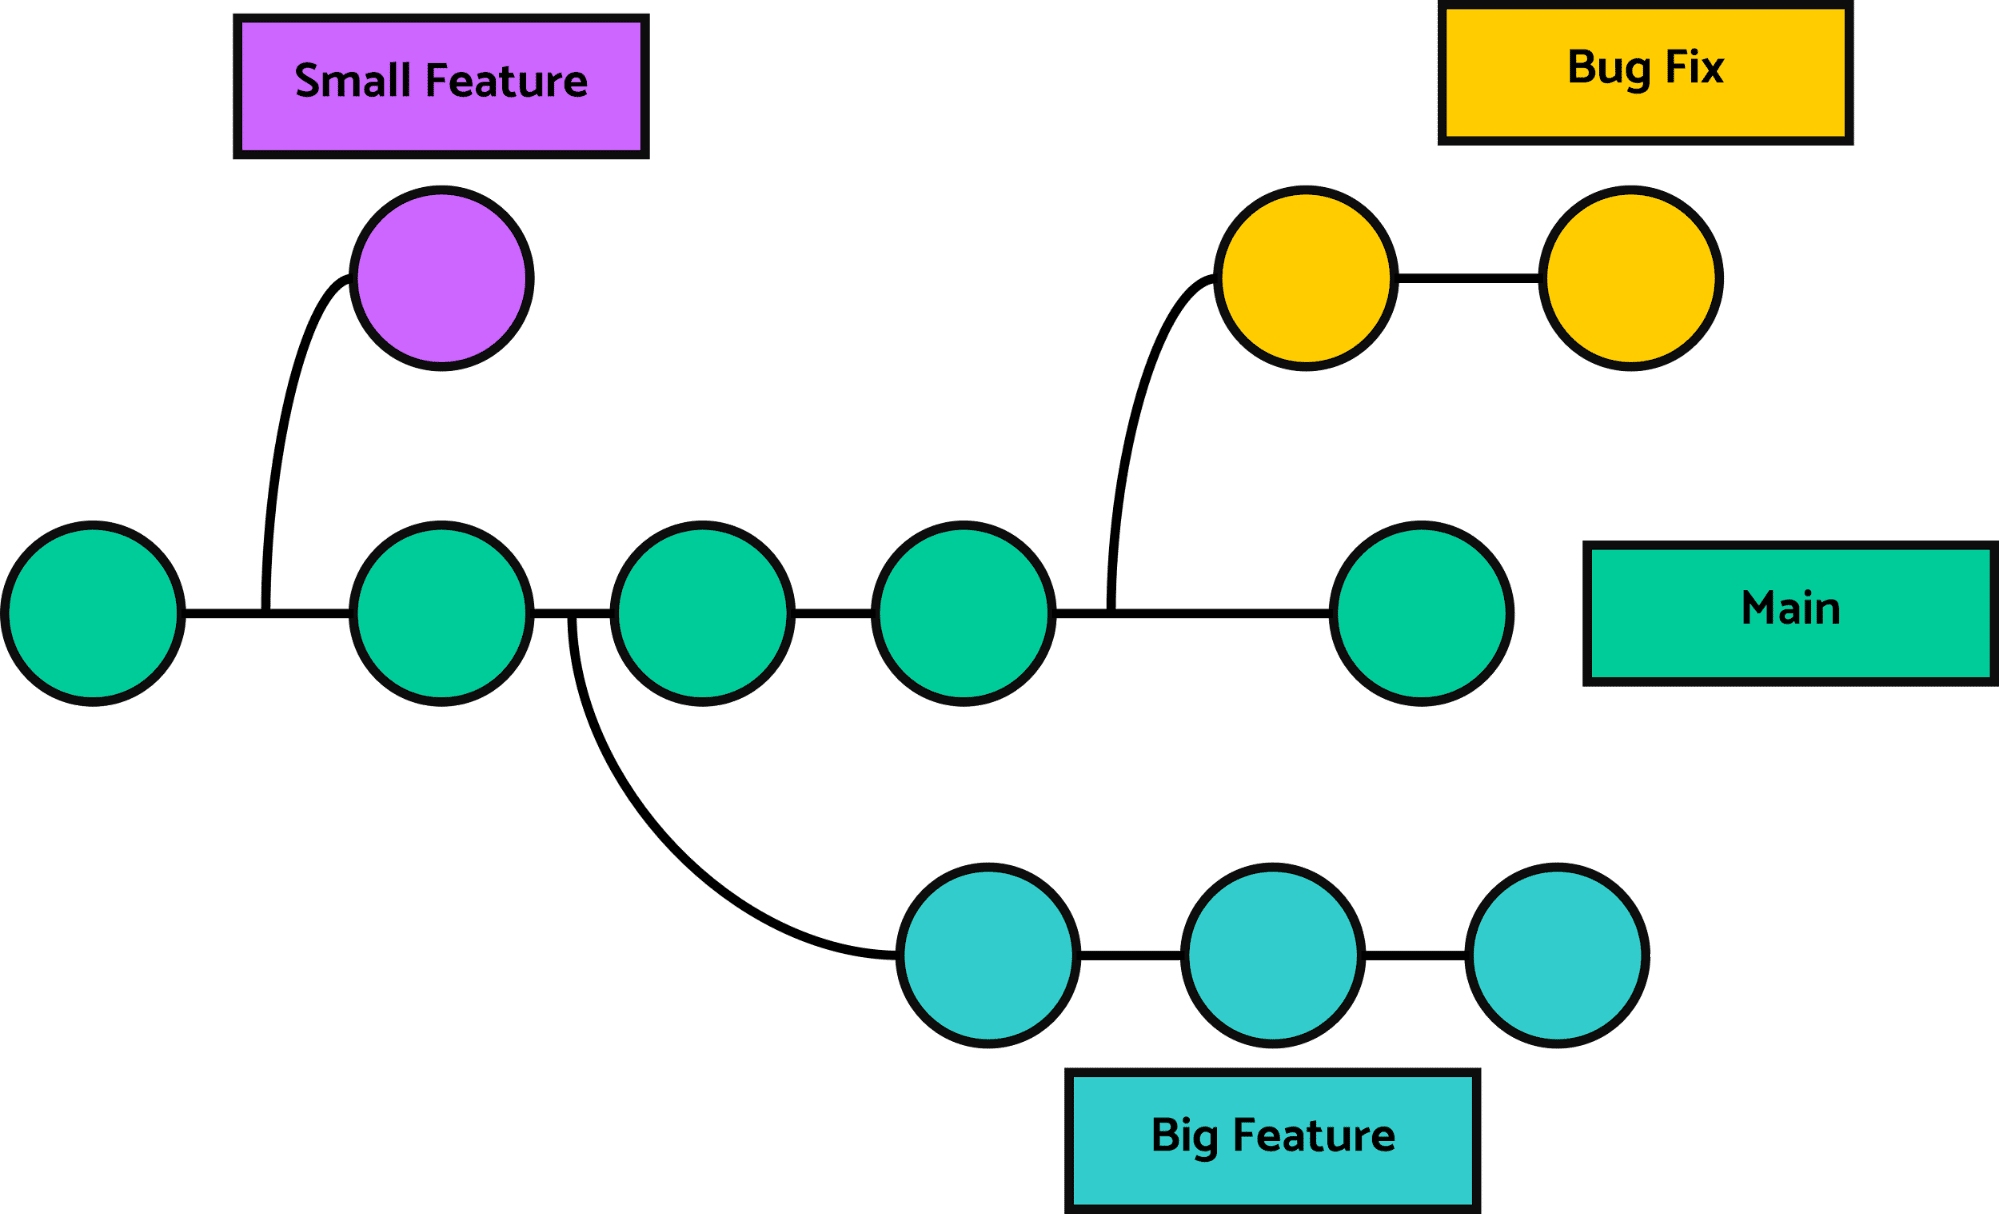
As visualized in the diagram above, one branch, generally known as the main branch, holds the version you’d use in production. Another three branches contain the codes for a significant new feature, a minor new feature, and a bug fix. These sub-branches isolate your code changes until you test the code and merge it into the main branch, and you can delete them when the work is completed.
What is Git HEAD?
Whenever you run a git log to check the recent commit history, it lists a bunch of commits you’ve made, and you will find something called HEAD near the latest commit made, as shown in the image below.
As you can see here, the HEAD refers to the latest commit 8a98ad12eeebd3aa072eb55702b176105f74cee7 of the currently active branch, which is the main. When you execute the git log after committing any changes, the HEAD always points to the most recent commit. Therefore, HEAD references the current branch’s most recent commit. HEAD functions like a pointer that continuously tracks the most recent commit in your working branch.
Look at the following illustration to further understand the Git HEAD.

In the above illustration, at first, the HEAD points to the first commit of the main branch, and as we keep entering the git commit command, the HEAD moves along with the recent commit. Finally, when we switch branches with checkout, the HEAD automatically transfers to the new branch and points to the most recent commit of that respective branch.
Note that HEAD doesn’t point to the commit directly; instead, it points to the branch name where the recent commit has occurred, and the branch points to the latest commit. However, when HEAD doesn’t point to the most recent commit, you go into the detached HEAD state.
Detached HEAD
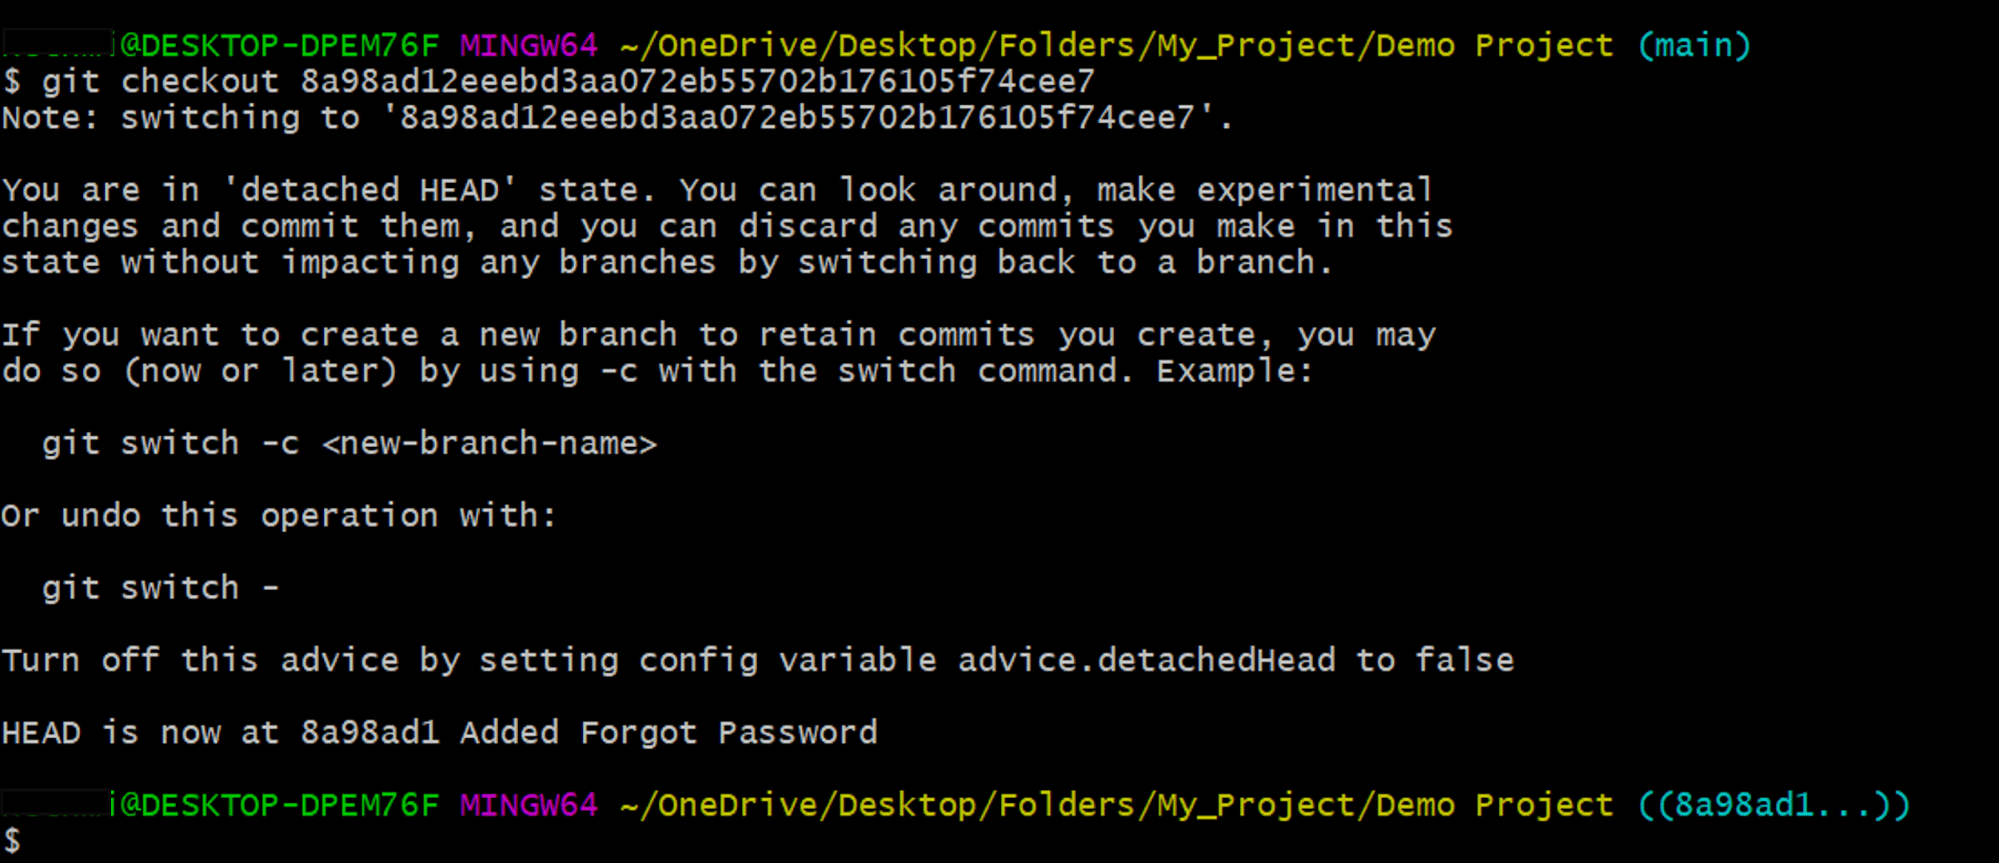
When in the detached HEAD state, the HEAD is not pointing into any branch tip, but instead, it is directly pointing towards a specific commit made. You can enter the detached HEAD state by running the following command.
git checkout <commit ID>This command is beneficial when you need to check the status of the project files in a previous commit or when you want to make experimental commits that you might or might not want to keep.
HEAD vs. head
So, what makes capitalized “HEAD” and lowercase “head” different from one another?
The lowercase head is a general term that refers to any commit that indicates a branch tip. In contrast, the uppercase HEAD references the branch’s latest commit that is currently being checked. Although a repository can contain multiple heads, there can be only one HEAD.
How to use Git HEAD?
When you are on the main branch, the HEAD will point to it. If you check out a different branch called styling, the HEAD reference will be updated to the styling branch. There are multiple ways to check the status of the HEAD reference.
Finding the HEAD and checking its status
1. Using the log command:
You can use the git log command and check the first commit record displayed to find the HEAD reference. If you don’t need additional information, such as the author and the commit date, you can include the –oneline config to omit those details.

Once you check out the styling branch and run the git log –oneline command, you should get an output similar to the one below.

The disadvantage of this approach is that it displays the entire commit history, which is unnecessary to determine the branch the HEAD is referencing.
2. Using the show HEAD command:
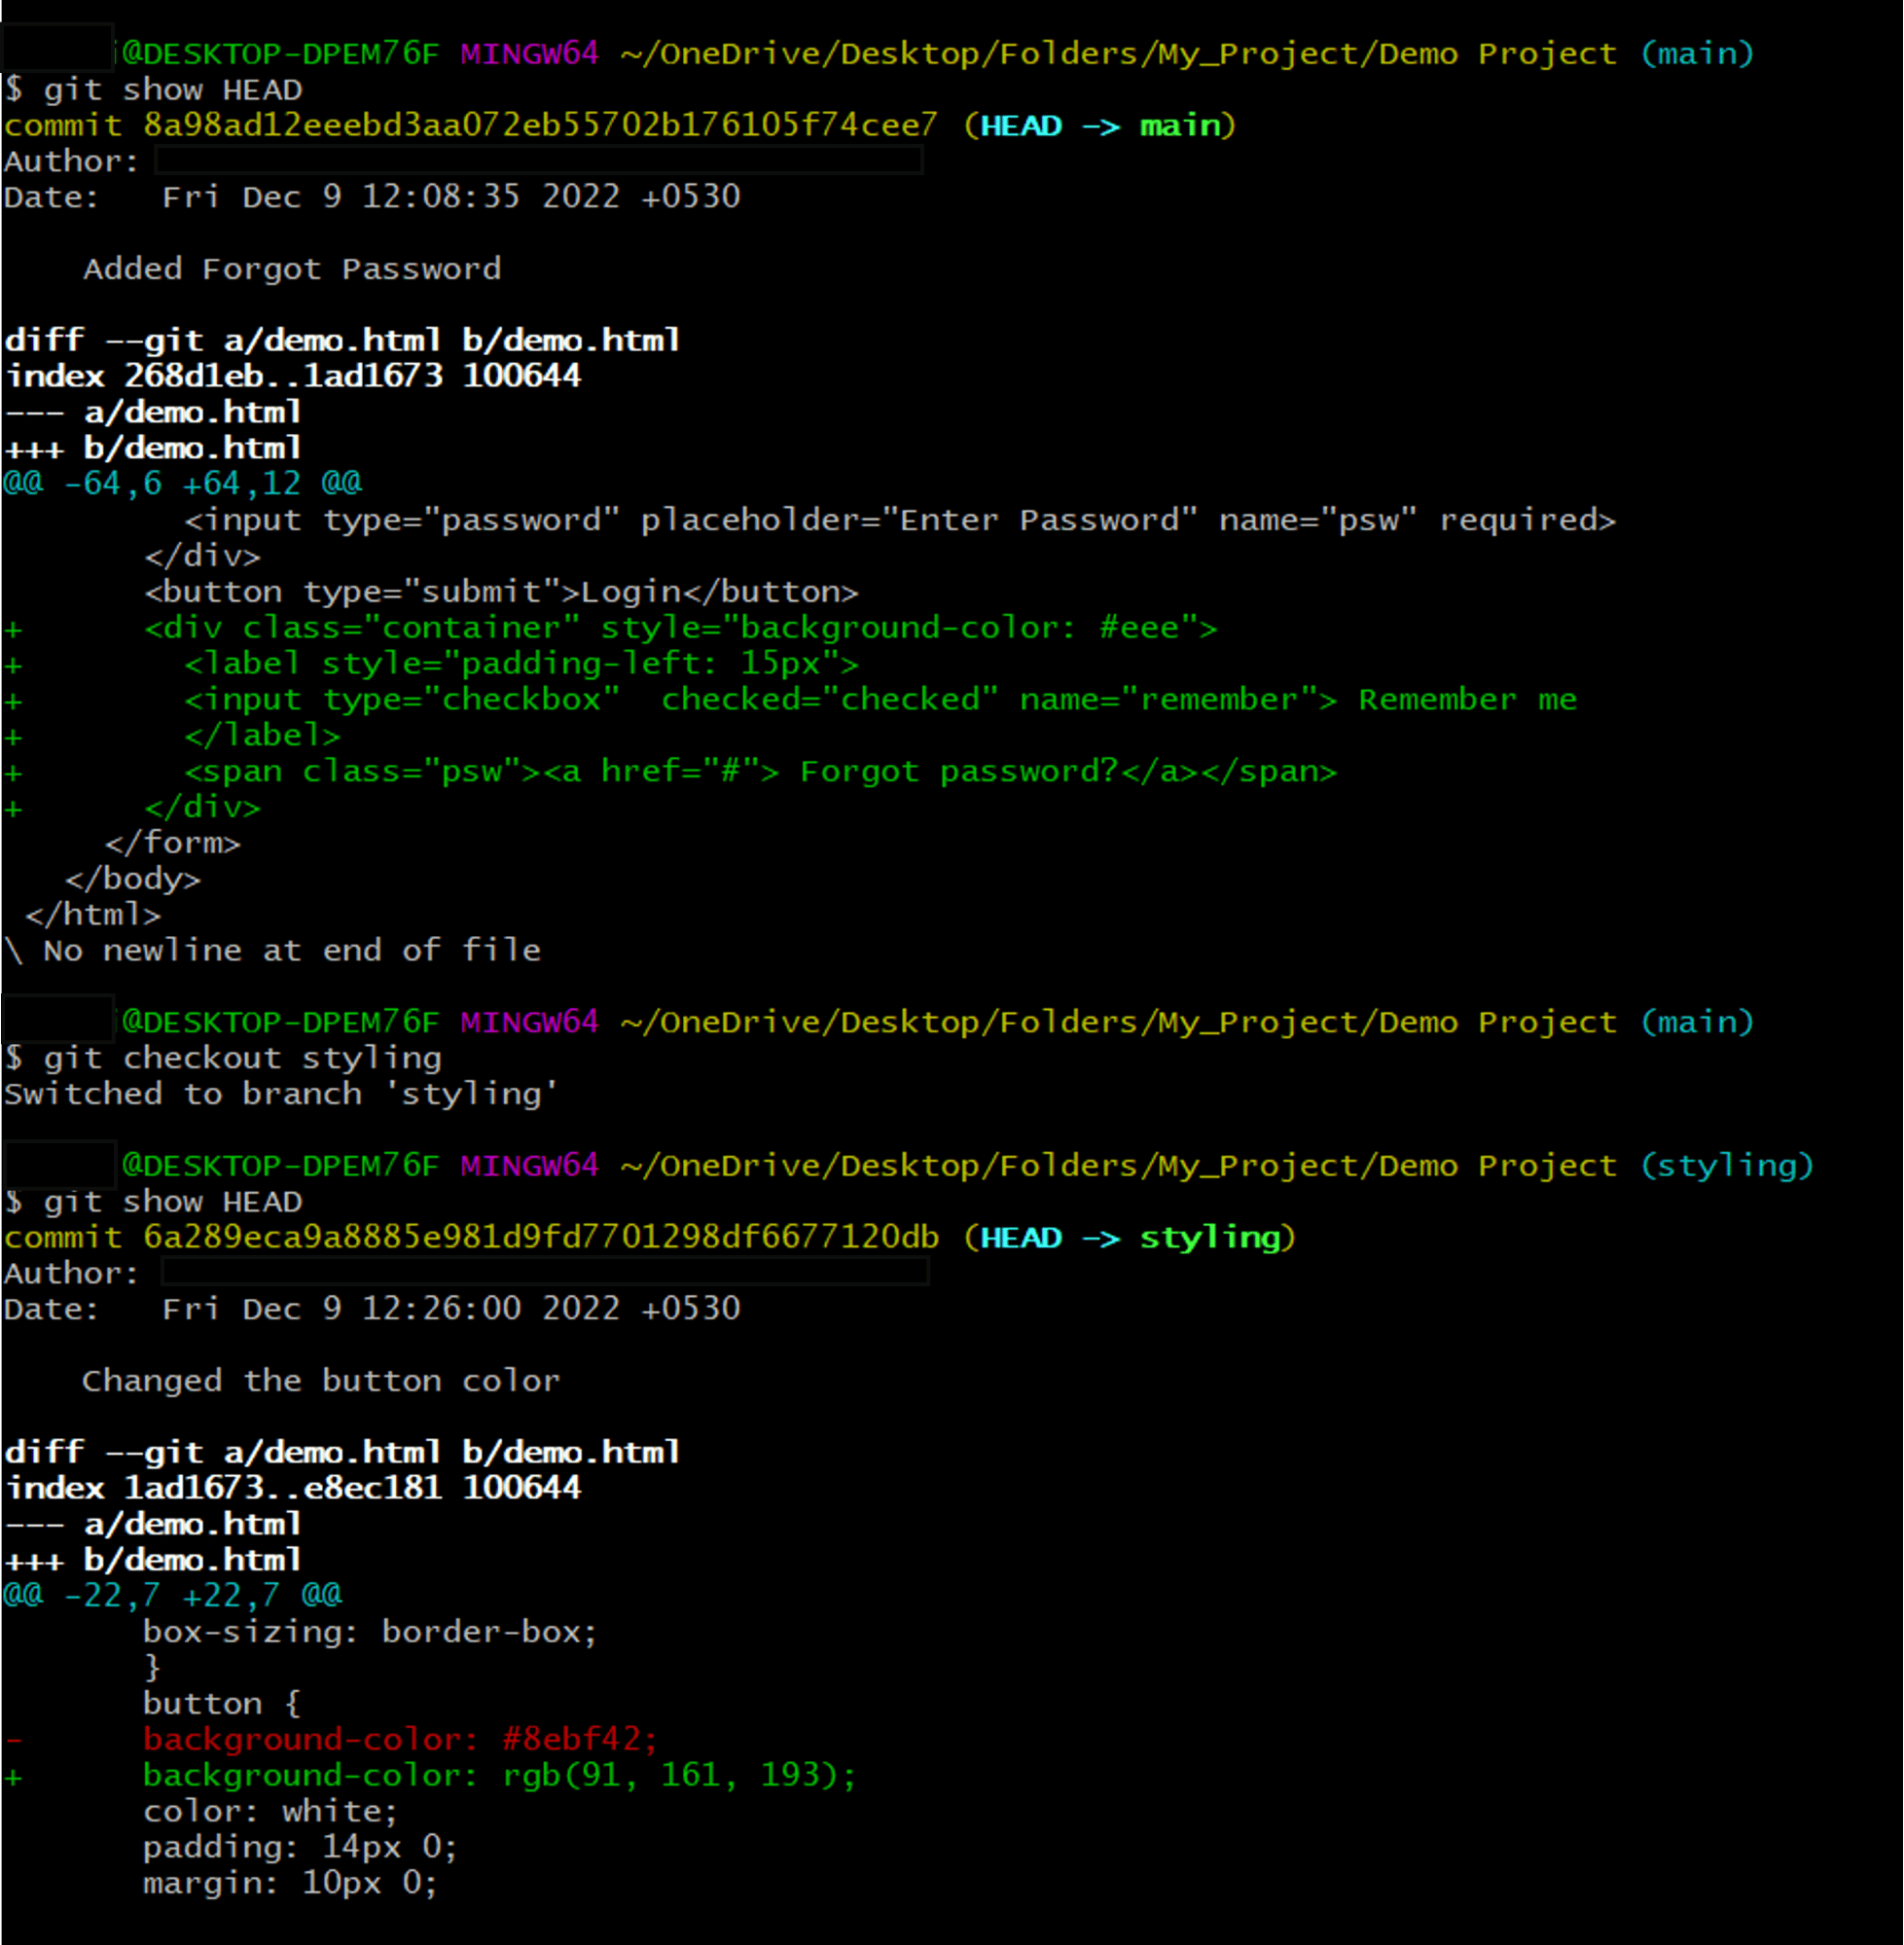
Another alternative you can use to find the HEAD status is the git show HEAD command. It will display the commit ID that the HEAD points to, the commit message, and the changes implemented during this commit. See the output below.
3. Using the symbolic-ref command:
According to the Git documentation, you can also use the git symbolic-ref HEAD command to find the branch that contains your current working tree.

You should see a similar output if your current active branch is the main branch. When you check out the styling branch, the value of the HEAD reference should be updated, as shown below.

4. Using the HEAD file:
You can find a HEAD file in the .git folder of the repository. This file stores a reference to the currently active branch of the working repository. You can read this file by opening it manually or by using the terminal. For example, you can use the cat .git/HEAD command to view what this file contains.

In this case, a local branch named “main” is the current HEAD. When you use the git checkout command, the HEAD is changed to point to the tip of the currently checked-out branch. So, executing the command git checkout styling will update the HEAD file as below.

This enables Git to understand which branch’s tip you are currently working on.
Navigating into and out of a detached HEAD
There are two recommended actions to take when in a detached HEAD state. Either you can start a new branch from the position of the detached HEAD, or you can switch back to an existing branch.
1. Switching back to an existing branch
If you don’t want to keep any changes related to the detached HEAD and only want to view a file of a previous commit, you can switch back to an existing branch using the git checkout command. For example, if you use the following command, the main will become your active branch, and its tip will be set to the HEAD.
git checkout mainAs we move on, this will eventually delete or prune any changes associated with the detached state. Apart from the Git checkout command, you also can use git switch – to automatically move to the branch you were previously on.
2. Create a new branch in the detached HEAD position
Sometimes, you have to keep the changes from the detached state. In that case, you can create a new branch using the git branch <branch_name> command. Then, checking out this new branch will remove the HEAD from the detached state.
HEAD~, HEAD^ and HEAD@{}
There are different variations of HEAD that you can use for various purposes. HEAD~, HEAD^, and HEAD@{} are three of them.
HEAD~
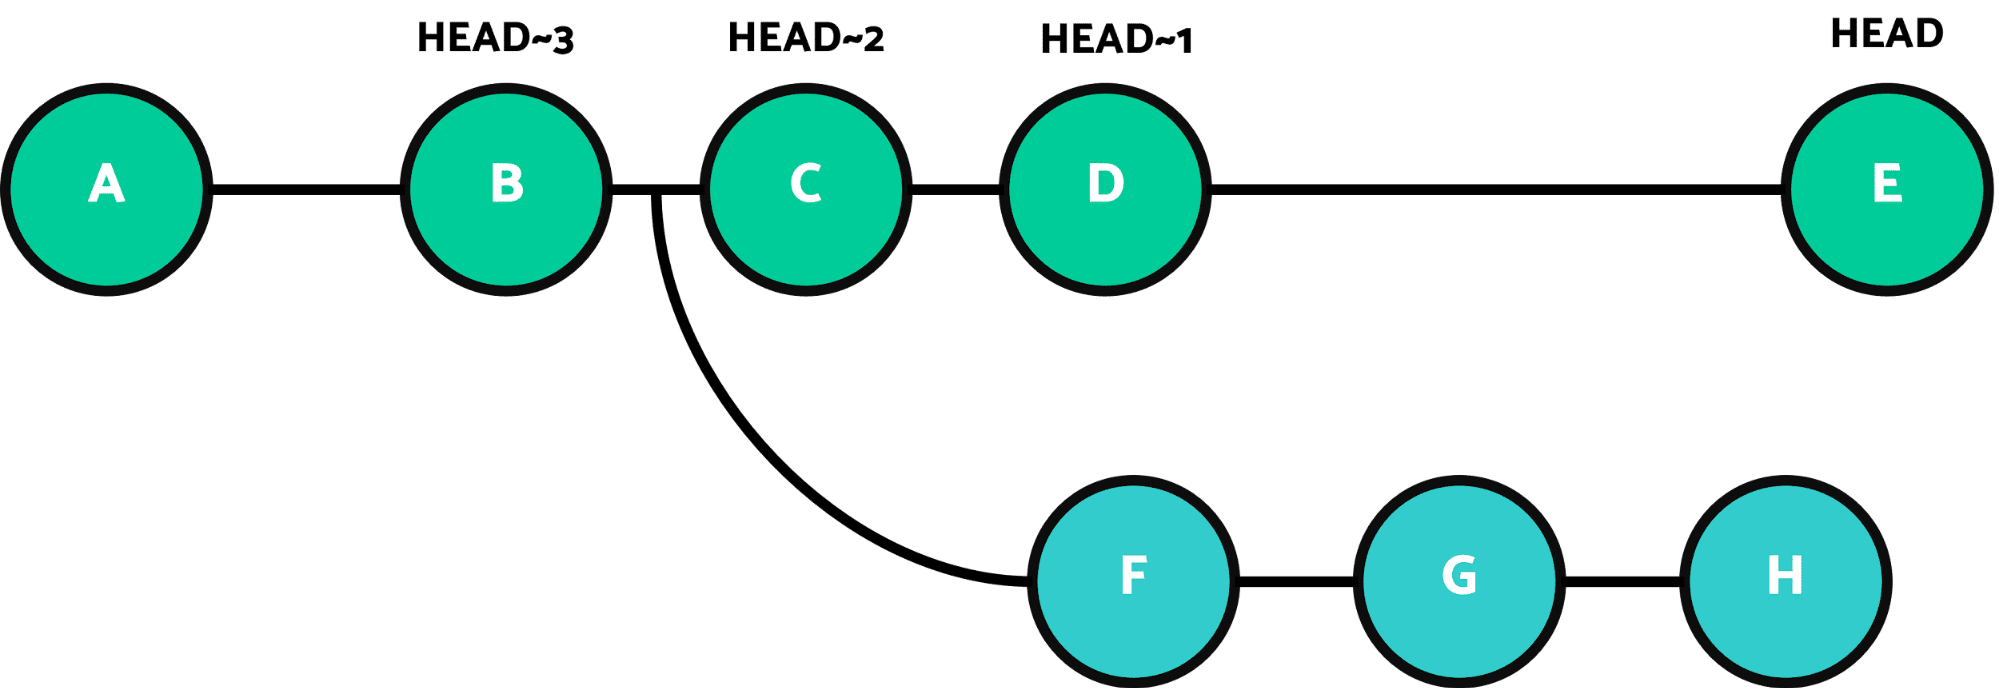
Git difftool command is used in Git to show the difference between two commits. However, when using the difftool command, you need to memorize or copy and paste the commit ids, which are pretty long. HEAD~ is an alternative command you can use for the difftool command, and instead of the long commit ids, you can use HEAD~1, HEAD~2, etc., to refer to a specific commit. HEAD~, the shorthand for HEAD~1, refers to the commit prior to the last commit of a particular branch. As you can see in the following diagram, you can use HEAD~ with a specific number to refer to each commit in a branch.
Let’s assume you need to check the difference between the previous two commits before the latest one. For that, you can use the following code.
git difftool HEAD~1 HEAD~2This code will open up your code editor and highlight the code changes that happened, as shown in the image below.

HEAD^
Git HEAD^ is the shorthand property used for Git HEAD^1. Git HEAD^1 denotes the first parent of the commit. Consequently, the commit’s second parent Git HEAD^2.

In this diagram, the styling branch merges into the main branch. Assume we are currently on the tip of the main branch, which is the “commit E.” As you can see, commit E has two parent commits: commit D from the main branch and commit H from the styling branch. In this context, the term parent-commit refers to a previous commit of a commit.
Whenever two branches are merged, the last commit of the branch merged onto is the first parent commit, while the last commit of the branch merged is referred to as the second parent. In our case, commit D is the first parent commit, and commit H is the second. You can use the following two code lines to get the first and second parent commits, respectively.
git show HEAD^ --oneline

git show HEAD^2 --oneline
If you try to get the HEAD^3 for the above example, Git will throw the following error as only two parents are available for commit E.

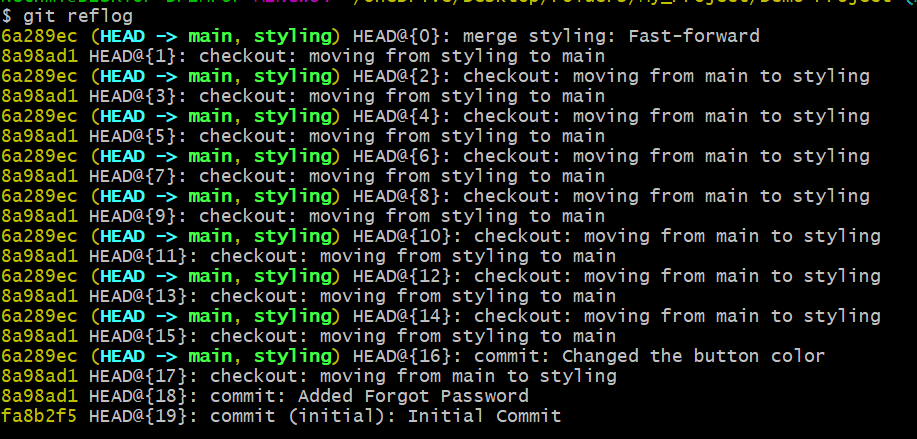
HEAD@{}
Git tracks changes made to branch tips using the git reflog tool. It enables you to revisit any previous commit. The reflog uses the HEAD@{} to refer to a particular time in the local repository.
Using Git reset to HEAD
Imagine you want to revert a set of changes and return to the previous state of the file. The “Reset to HEAD” technique is quite a powerful tool for resetting files on Git. Five alternatives are available for this operation: hard, soft, merged, mixed, and keep.
Using Git reset HARD
The reset level you receive will vary depending on the option you choose or utilize with the Git reset command. The git reset –hard is the most effective if you want to undo your recent commit completely. When you execute this, the head of your file will change. For instance, it won’t longer point to your most recent commit. In addition, it will modify your current working directory and remove your most recent commit from the index. Take a look at the following commands. The Git reset command can be used with the –hard config to execute different levels of hard resets on the HEAD.
$ git reset --hard HEAD (revert back to HEAD)

$ git reset --hard HEAD~ (revert back to the commit before HEAD)

$ git reset --hard HEAD~2 (revert back two commits before HEAD)

$ git reset --hard HEAD^ (equivalent to HEAD~)#
The only thing that will change if you use any other option with the git reset command is the position of your head. It won’t alter your working directory or index any other way.
All eyes are on your code
By now, you can hopefully understand the different variations of Git HEAD and how to use them. A basic understanding of what Git HEAD is will make it easier for developers to navigate files and branches and find and modify commands.
Similarly, Lightrun improves visibility over your code by enabling you to add logs, metrics, or traces in production. Plus, you can track these in real-time. Mistakes happen, but they shouldn’t be letting your live app down. Using Lightrun, you can quickly fix vulnerabilities, improve productivity, and ensure your app is never affected. Interested? Book a demo with us.