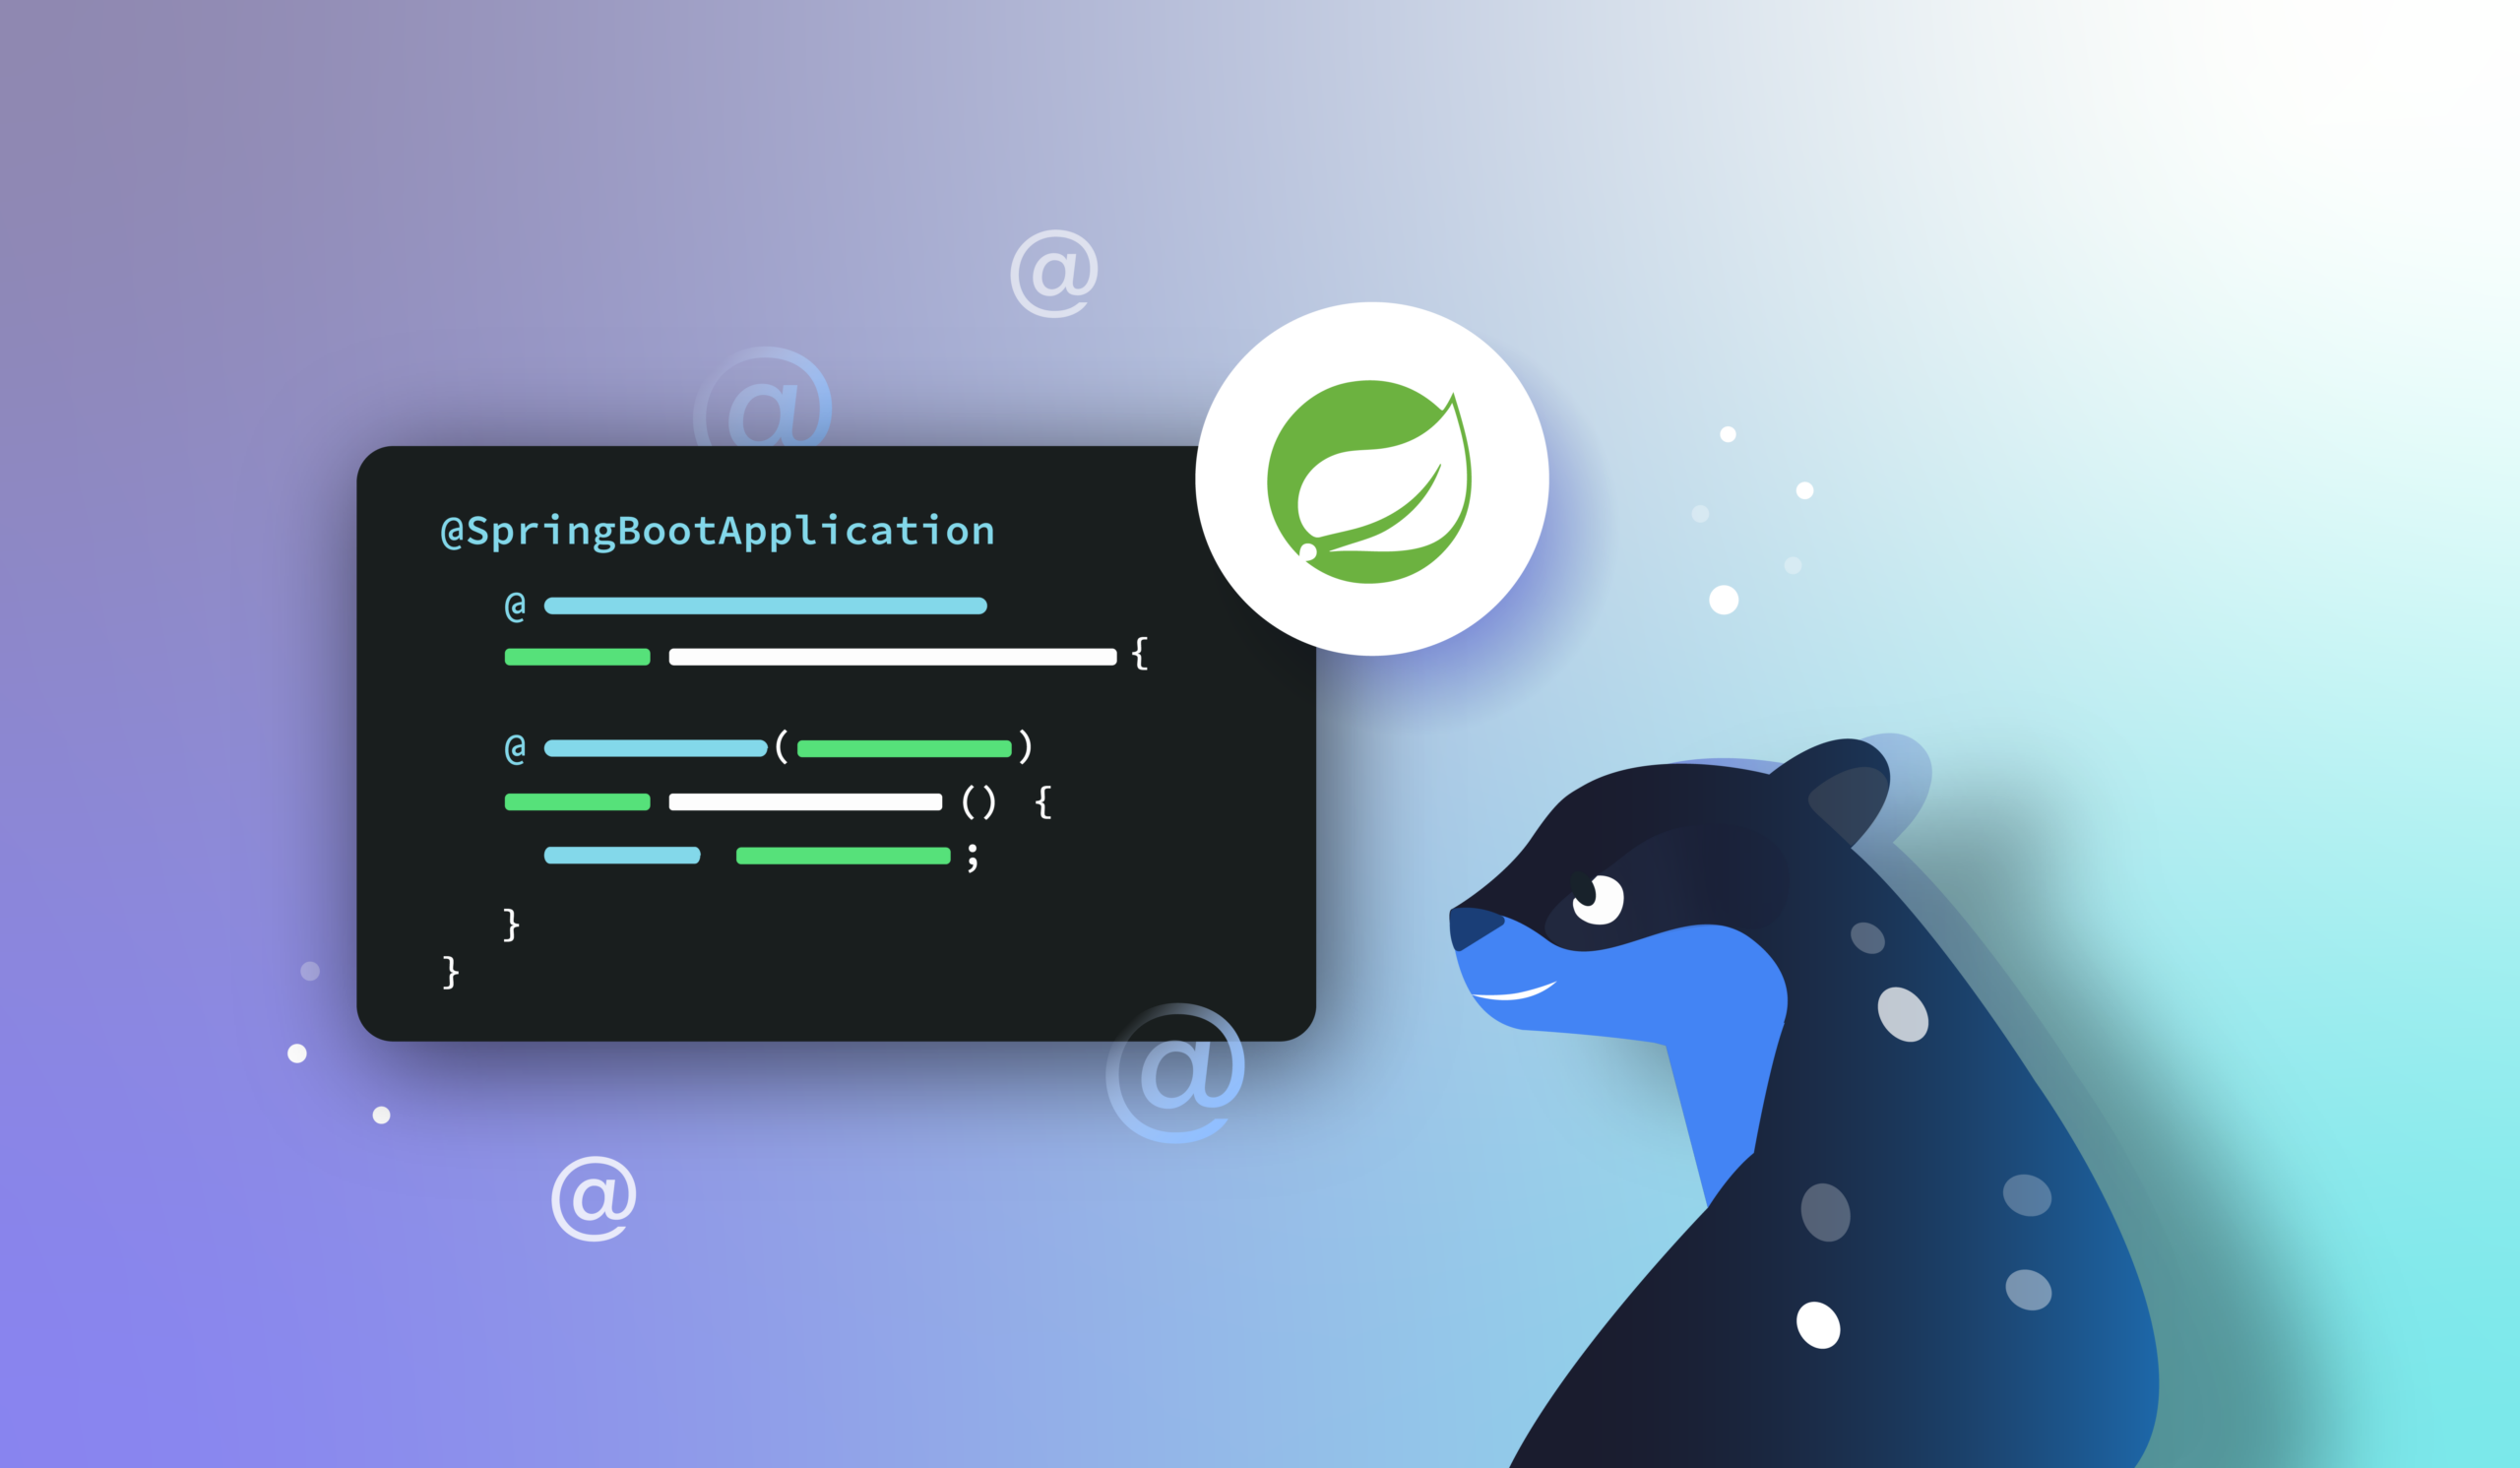
The Complete List of Spring Boot Annotations You Must Know
Spring Boot is the most popular Java framework, with over 50 percent of developers using it.
Java engineers working in the spring framework can deploy web applications quickly, without the need for a separate server. Spring focuses on speed, simplicity, and productivity. It uses Inversion of Control, or IoC, and dependency injection to increase modularity and enable loose coupling.
Spring Boot builds off of the Spring framework. It’s an opinionated framework, making decisions for you and minimizing the amount of configuration and boilerplate code you need to get started.
Spring applications need a fair amount of configuration. Things like Maven dependencies, MVC configuration, and security all require a lot of code to get up and running. Spring reduces or eliminates these needs entirely, instead allowing you to override any of the defaults it selects for you.

Convinced? It’s easy to try out. Spring’s website has an easy quickstart guide, and lets you create a test application with a few clicks. You can use it with different languages and spring versions and add whatever dependencies you need.
Spring Boot Annotations
Spring Boot’s annotations are key to getting up to speed with the framework. They allow you to direct the framework to do your bidding, taking control and overriding its defaults when needed. Annotations are quick, easy to use, and orders of magnitude faster than building the equivalent functionality yourself.
You can learn more in Spring’s documentation. The PDF or web versions are essential reading if you plan on working with Spring Boot.
Knowing how to use annotations can level up your game and help you get the most out of the framework. Listed below are several common annotations, some of them with sample code. Spring Boot works with Java, Kotlin, and Groovy. I’ll use Java for the examples in this article.
- Basic Setup
-
@SpringBootApplication -
@Configuration -
@ComponentScan -
@EnableAutoConfiguration
-
- Request Responses
-
@GetMapping -
@RequestMapping -
@RequestParam
-
- Component Types
-
@Component -
@Service -
@Repository -
@Controller -
@RestController
-
- Testing
-
@SpringBootTest -
@MockBean -
@Validated
-
- Misc
-
@Bean -
@ConditionalOnJava
-
List of Essential Spring Boot Annotations
There are many annotations you can use to control and define your applications. Here are some of the most useful, sorted by category.
1. Basic Setup
@SpringBootApplicationAvailable since version 1.2, @SpringBootApplication replaces several other key annotations and as such, is essential to nearly all Spring Boot applications.
The 1.2 version delivers the same functionality as the near ubiquitous @Configuration, @ComponentScan, and @EnableAutoConfiguration.
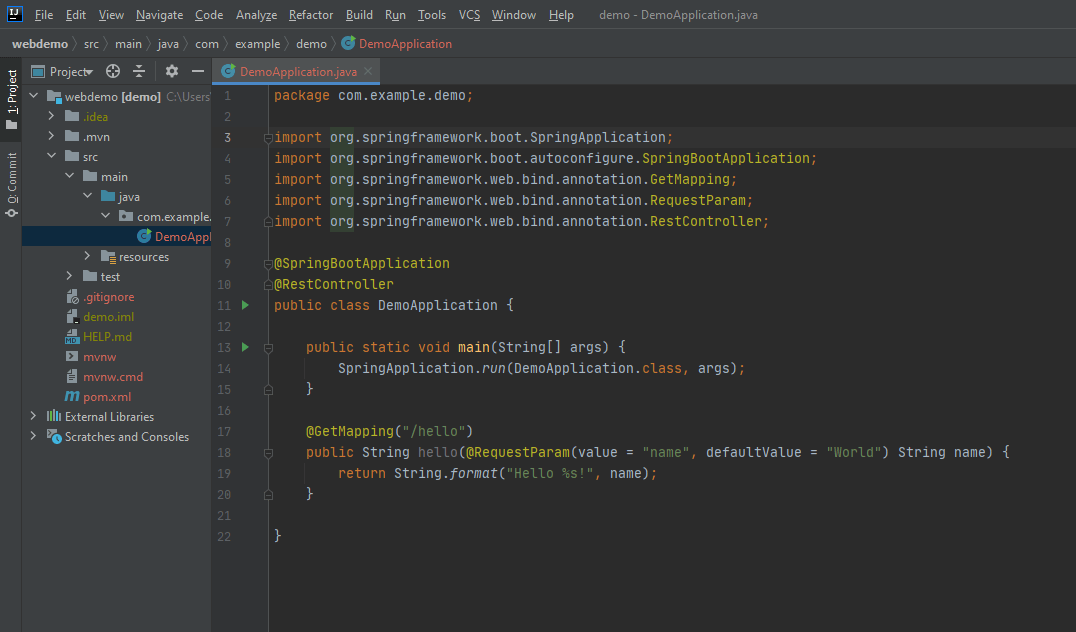
This is a good place for a simple Hello World, based on Spring Boot’s demo application, so here goes:
package com.example.demo;

import org.springframework.boot.SpringApplication;
import org.springframework.boot.autoconfigure.SpringBootApplication;

@SpringBootApplication
public class DemoApplication {

    public static void main(String[] args) {
   	 SpringApplication.run(DemoApplication.class, args);
    }

}
It’s not much of a Hello World though, as it doesn’t actually display anything. For that, let’s introduce @RestController and @GetMapping. But before that, let’s talk about the annotations that @SpringBootApplication replaces.
@ConfigurationNow superseded by @SpringBootApplication, @Configuration enables Java configuration and lets you use Spring Beans in the class.
@ComponentScanAlso superseded by @SpringBootApplication, @ComponentScan enables component scanning and means controller classes and components you create can be discovered by the framework. It marks classes to be discovered with @Controller.
If you include the @ComponentScan annotation, then all application components will be registered as Spring Beans automatically. That includes @Service, @Component, @Repository, @Controller, and others.
@EnableAutoConfigurationThe final annotation replaced by @SpringBootApplication, @EnableAutoConfiguration enables Spring Boot’s autoconfiguration. Spring Boot makes over 200 decisions for you. These can be overridden if you want to make your own choices, but it will pick sensible defaults for you, saving you a lot of time at the beginning of projects.
The exclude attribute is used to disable autoconfiguration for specific classes.
2. Request Responses
The next few annotations show how easy it is to respond to HTTP requests using Spring. There are several ways to mark classes and functions to control how they behave and what they return.
@GetMappingTake a look at your earlier Hello World and get it returning a response.
In this example, again from Spring’s demo code, the @GetMapping class combines with the @RestController to deliver a response to calls like https://yoururl/hello.
Here it’s a simple Hello World by default, though it also shows how to take a parameter, which can replace the default World in the response. https://yoururl/?name=Dave will return Hello Dave, for example.
package com.example.demo;

import org.springframework.boot.SpringApplication;
import org.springframework.boot.autoconfigure.SpringBootApplication;
import org.springframework.web.bind.annotation.GetMapping;
import org.springframework.web.bind.annotation.RequestParam;
import org.springframework.web.bind.annotation.RestController;

@SpringBootApplication
@RestController
public class DemoApplication {

public static void main(String[] args) {
SpringApplication.run(DemoApplication.class, args);
}

@GetMapping("/hello")
public String hello(@RequestParam(value = "name", defaultValue = "World") String name) {
return String.format("Hello %s!", name);
}
}@RequestMappingThis can combine with @Controller to create a class that returns simple requests, such as the following code:
@Controller
@RequestMapping("users")
public class UserController {

    @GetMapping("/{id}", produces = "application/json")
    public @ResponseBody User getUser(@PathVariable int id) {
    	return findUsersById(id);
    }

    private User findUsersById(int id) {
    		// return user specific data
    }
@RequestParamAs seen in the code above, @RequestParam allows you to send parameters in the get request and use them in Java. It also supplies a default value.
3. Component Types
There are several annotations to let you label components in your application. Aside from @RestController, these are functionally identical, but allow you to organize your application and mark classes for specific roles, helping to keep your application modular.
@ComponentApplication components and their variants are automatically registered as Spring Beans, providing dependency injection, provided you use either @SpringBootApplication or @ComponentScan.
@Repositry, @Controller, and @Service are move specific alternatives to @Componenet.
@ServiceThis is an alternative to @Component that specifies you intend to use the class as part of your service layer. However, it doesn’t actually implement anything differently than @Component.
@RepositoryThis annotation marks a class as part of your data layer, for handling storage, retrieval, and search. This can be especially useful for targeting your tests and generating the right exceptions.
@Controller@Controller is a specialized @Component marked as a controller in MVC architecture.
@RestController@RestController combines the @Controller and @ResponseBody into a single annotation. @RestController classes return domains instead of views.
4. Testing
As it should, Spring Boot makes it very easy to write tests. Identifying and fixing errors is much easier when the framework helps you.
@SpringBootTestThough Spring Boot can use regular Spring tests using the @Test annotation, it has a special annotation—@SpringBootTest—that lets you test using Spring Boot specific features.
@SpringBootTest works best when testing the whole application together. There are other options, such as @WebMvcTest and @DataJpaTest to use, if you’re looking at those specific areas.
You can mark a test class as follows:
@SpringBootTest(properties = "spring.main.web-application-type=reactive")
class YourTests {
    // code here
}@MockBeanThe @MockBean annotation allows you to create a temporary version of a service for testing. It’s useful if you have a web service you connect to that isn’t suitable for testing, or if you want to test against specific results.
Here’s an example, based on Spring Boot’s documentation.
import org.junit.jupiter.api.Test;
import org.springframework.beans.factory.annotation.*;
import org.springframework.boot.test.context.*;
import org.springframework.boot.test.mock.mockito.*;

import static org.assertj.core.api.Assertions.*;
import static org.mockito.BDDMockito.*;

@SpringBootTest
class ServiceTests {

    @MockBean
    private RemoteService remoteService;

    @Autowired
    private Capitalizer capitalizer;

    @Test
    void exampleTest() {
    	// RemoteService has been injected into the capitalizer bean
    	given(this.remoteService.testCall()).willReturn("test");
    	String caps = capitalizer.capitalizeTestCall();
    	assertThat(caps).isEqualTo("TEST");
    }

}@ValidatedTo validate input for methods, you apply the @Validated annotation to the class. For nested properties, apply the @Valid tag.
Here’s an example of using the @Validated tag along with javax.validation constraints.
import javax.validation.constraints.Size;
import javax.validation.constraints.NotNull;
import org.springframework.stereotype.Service;
import org.springframework.validation.annotation.Validated;

@Service
@Validated
public class TestBean {
public Archive findByCopiesAndTitle(@Size(min = 1, max = 100) String code, @NotNull Title title) {
return …
}
}
Miscellaneous
@BeanDependency injection is central to Spring Boot, and the @Bean annotation allows you to mark tightly coupled classes. That tells the Spring container to handle their lifecycle.
It’s useful if you have a class that requires an instance of another class as a property, or in other similar scenarios. The Spring IoC container makes sure all dependencies are satisfied. When the bean is created, it makes sure everything is instantiated in the right order, and nothing is left out.
@ConditionalOnJavaIf you want code to run only on a particular Java version, this annotation is very handy.
@Service
@ConditionalOnJava(JavaVersion.EIGHT)
Class UserAlertService {
    // strongly suggest a Java update
    ...
}
There are several other conditional annotations, too.
@ConditionalOnProperty, @ConditionalOnWebApplication, @ConditionalOnClass, and many others can be used and combined as needed. Check them out if you want to offer variable functionality, but be wary of relying on this kind of thing too much. It’s all too easy to get tangled up.
Conclusion
Spring Boot makes life faster and easier. It provides automatic configuration and gives you a ready-made starting point for your application, with many built in features, saving you the need to write boilerplate code.
Knowing how to use its annotations helps you take full advantage of everything Spring Boot offers. Annotations provide complicated functionality for almost no coding time, so the impact on your development speed can be huge.
If you’re new to Spring Boot, learning its annotations is a no-brainer. Don’t stop here though. You can learn more about the annotations covered here, as well as others available in the Spring Boot documentation. Spring Boot also has an active community willing to answer your questions and help you build better applications.
For more help building web applications, create a Lightrun account. It can help Java, Python, and Node developers log and debug applications in real time, delivering metrics on running services. If you’re working in Spring Boot, Lightrun can help you get feedback on how well your app runs, giving you another way to improve your code.


It’s Really not that Complicated.
You can actually understand what’s going on inside your live applications.